How To Write a Book in 30 Days
2. Gather Ideas
You’ve begun to write on a regular schedule; that’s awesome! But you’ve got so many ideas, so many things you want to include in your book.
How can you corral all those ideas into some manageable sequence that makes sense to you and, more importantly, makes sense to your reader?

Getting Started
At this point, it can be difficult to even know where to start.
When I’m just beginning a book, I try, at first, just to get my ideas out of my brain and in front of my eyes. I don’t worry about their order or if they fit or if they’re important to what I want the book to eventually become. Nothing matters now, but getting them out.
Module 2: Gather Ideas
Using PostIt® notes
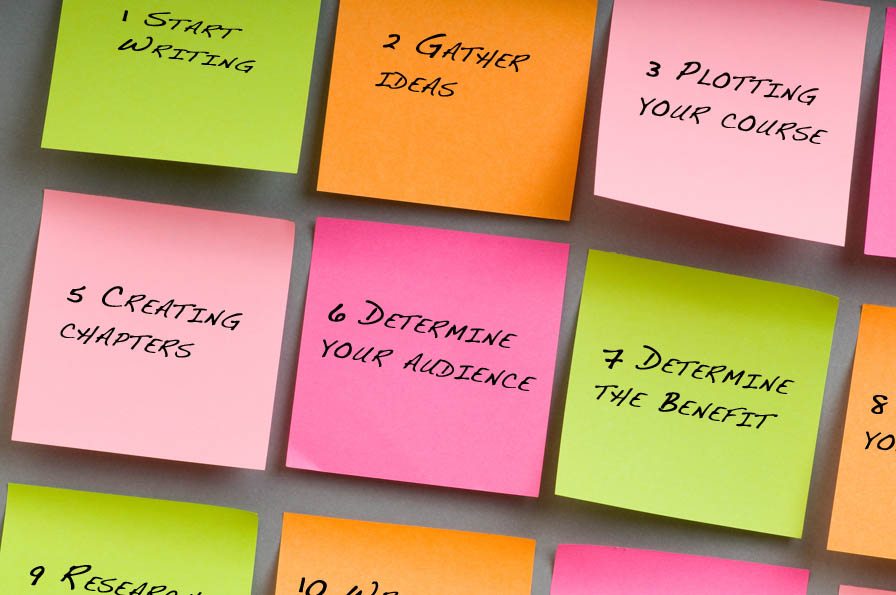 For this task, I use an “analog modular capture and recording system,” … otherwise known as PostIt® notes, Sticky notes, or Stickies. This exercise is easy, productive, and amazingly liberating! All we’re doing is getting our thoughts out. What are the pieces of information (eventually, they’ll be chapter candidates) that will make up the central theme or message of your book? Remember, they don’t have to be perfect, in order, or even right; they just have to be out there.
Using paper Sticky notes and writing out your ideas by hand is an important step in this creative process. At this point, avoid the temptation to just list the ideas on your computer, phone, or any other digital device. Do this part of the process by hand, with pen and paper. Choose a pen, marker, colored pencil, whatever you feel most creative with, and colored sticky notes, not a legal pad. There’s a reason for this; it’s called the hand/brain connection. Many studies show that different parts of the brain are activated by writing something by hand rather than typing it on a keyboard. Writing out your ideas by hand on stickies can produce deeper, more creative, more memorable ideas than typing them out on a keyboard.
Now that you have a stack of Stickies with all the ideas or ‘pieces’ in front of you, out of your brain and onto paper, you can begin sorting the pieces, but we’ll cover that in the next chapter. Your job today is to grab some Stickies and start writing! When it comes time to arrange and sort your stickies, do it by hand; the same principles of creative process and result apply. And it’s more fun.
I love to do this exercise with real paper Sticky notes; there’s something liberating and, I think, more creative about writing short ideas on little squares of colored paper, then sticking those ideas to the wall, the window, or any other flat surface I can commit to the task. When they’re stuck, I can back away a bit, look at them, and consider where they fit in the big picture, or if they fit at all. Then I can rearrange them to my heart’s delight. Ahhh! That’s what I call satisfying! You may not be as weird about this as I am, but give it a try. I think you’ll enjoy it and even surprise yourself with the ideas that come out. Anyone watching the process or seeing the Stickies everywhere may either think you’re a genius or a nut, but they’ll definitely know you’re in the process of creating.
After you’ve written and stuck, and sorted your Stickies, you’ll want to transfer the paper Stickies to digital Stickies. Saving your paper Stickies in a digital format will keep them organized without losing them, and there will most likely be some more “moving around” down the line as you organize and develop your thoughts.
Digital Stickies
Both Mac and Windows computers come with “Sticky Note” software already installed. (Links for how to find and use the Sticky Note apps are included at the bottom of this page.)
When you’re transferring your paper Stickies to digital Stickies, feel free to edit or add notes. You’ll find that the digital Stickies are easy to move around the screen, just like you moved the paper Stickies around on the wall or window, so feel free to arrange and rearrange them throughout the process of writing your book.
Again, resist the temptation to skip the paper Stickies and go straight to the digital ones; you’ll be skipping the opportunity for your brain to unleash the ideas and creativity that can only come from the hand/brain connection of writing down each idea by hand. It would save me some time if I could do my Sticky note exercise digitally from the get-go rather than transferring ideas from my brain to bits of paper and then to my digital files, but I’m afraid I might miss creative ideas that naturally emerge from doing this exercise by hand.


Linear vs. Non-linear Processes
You may have heard of linear thinkers vs. non-linear thinkers. Linear thinkers process their thoughts in terms of a = b, b =c, and therefore a=c. They are very process-oriented; step one leads to step two, which leads to step three, and so on. In writing a book, they’re apt to begin with writing the Introduction, then writing chapter one, then writing chapter two, and so on. Linear thinkers tend to be more organized or at least look more organized than non-linear thinkers.
Non-linear thinkers tend to be more creative and also more haphazard in their approach. They tend to approach problems or tasks in a series of seemingly non-related or non- sequential steps; a doesn’t equal f, but f needs to be included, so we’ll bring it up and stick it over there for the time being.
Whether you’re a linear or a non-linear thinker, or a mix of both, don’t worry; planning your book is going to involve both. Instead of being concerned with what kind of thinker you are, we’re going to focus on the process. Parts of the process, like this part, Gathering Ideas, are non-linear. Later, in Plotting Your Course, we’ll take all of those non-linear ideas and organize them into a logical, sequential, linear path we can follow to the finish.
Homework
- Buy Sticky Notes: Not just yellow! Buy colors to represent different idea groups, chapters or subheads.
- Write your ideas on the Sticky Notes. Don’t hold back! Sticky notes are cheap and plentiful. This execisr it to pull out all your ideas and creativity. No idea is too small or crazy for a Sticky Note!
- Start Arranging! Commit a wall, window, whiteboard or any vertical surface that will securely hold your Sticky Notes. I don’t prefer horizontal surfaces for this exercise. Horizontal surfaces tend to collect other things and I want this space to be for your ideas only.
- Find the Sticky notes app on your computer. Here’s how to find the app on your Mac: https://www.lifewire.com/use-sticky-notes-on-mac-5222641 Here’s how to find the sticky app on your PC: https://support.microsoft.com/en-us/topic/get-started-with-sticky-notes-86b36182-fdf5-4f9b-af7a-2846f83263f5